
Making homemade vanilla extract was always kind of in the back of my brain. There’s a sense of satisfaction you get when making an ingredient to put in your baked goods. In this case, it’s vanilla extract.
I recommend anyone to make it! It’s fun, super easy, and in the long run, cheaper.
It was in the winter of 2019 that the idea of the extract really became a possibility. I saw someone making it on Instagram, and it was so easy! I only needed two ingredients, plus some bottles. But other things came around, and I forgot about it. Later in the summer of 2020, I saw something about vanilla extract again. This time, I went on Amazon and bought the vanilla beans, bottles, and later some vodka. I did some research on techniques and the best ways how to make the best extract.
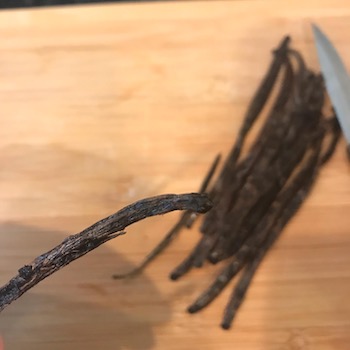
- Beans: I bought two different kinds, Madagascar (one with a stronger and richer flavor) and Tahitian (with a more floral flavor). I couldn’t really taste the difference, but I could smell the difference. The Tahitian beans are also cheaper, so that’s a bonus.
- For the vodka, I used 70% proof (35% alcohol). You could also use other liquors (rum, brandy, bourbon), but it will give a different result. Vodka is the most common because it’s flavorless, helping the vanilla to come through more.
I washed the four bottles I was going to use, dried them out, and then prepped the beans. I cut them open long way, and since the bottles were only 8oz, I also cut them into thirds so that they fit. I filled the bottles with the vodka to almost the top but leaving some space for shaking.
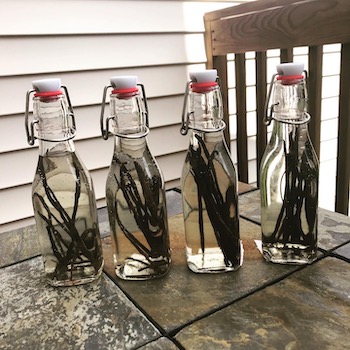

When I put everything together, I brought the bottles down to a cool and dark place. In this case, my closest. I shook them once or twice a week, but now, I try to shake them once a month or when I remember.
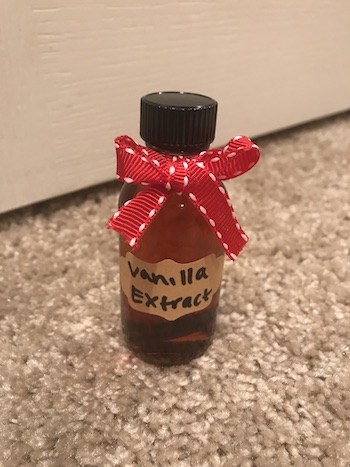
In December 2020, I bought 2oz bottles to put the vanilla in and gift them away. They make some of the best gifts! Cute, usable, and can’t go bad.
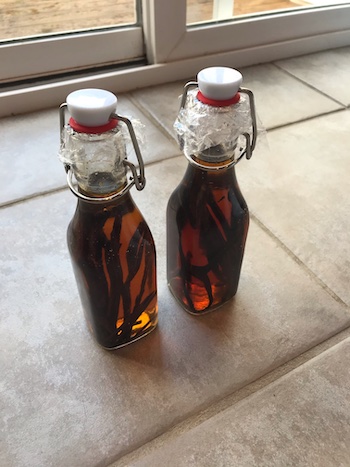
I have used up two bottles at this point (June 2021), and I have two left. I have also refilled one of them, so I kind of have three left. Once you finish one bottle, you can usually refill it. It will take longer than the first time to get a good flavor, but it still works.
Here are some tips:
If you’re thinking about making this for a gift, start the extract at least 4-5 months before you need it. Most places say 6 months, but I was impatient and used it after 4 months and was fine. But Just remember, the longer it’s soaking, the better.
It’s recommended to use 5-6 vanilla beans for each 8oz bottle. I think I used about five beans in each bottle. But if you put more in, it will just be even better!
I read somewhere that your vanilla extract can evaporate while just sitting, so I put plastic wrap over them. I’m not sure if it’s entirely true, but I didn’t want to chance it.
Some of the other really helpful sites about vanilla are:
Let me know if you make some vanilla extract!
~Becky 🙂


What a great idea! I think I will try this. Vanilla is so expensive these days!
It’s so fun! 🙂
I haven’t made my own vanilla extract in a long time and you’ve inspired me to do so! Lots of great tips too.
Great! Have fun making it! 🙂